INDIANA’S SAFEST CHOICE FOR ROOFING & SIDING317-674-4900|765-573-5899

8 Things to Consider When Replacing Your Roof: A Guide for Indiana Homeowners

Jun 1, 2025 | Roofing

Planning a roof replacement in Indiana isn’t just a matter of picking shingles and setting a date. With the region’s severe weather patterns, local building codes, and the importance of long-term value, choosing the right materials and contractor can protect your investment for decades. There are several factors to consider when planning a roof replacement, including cost, materials, and timing, all of which can significantly impact your decision.

If you’re a homeowner in Indianapolis, Bloomington, or surrounding areas, here’s what to know before you move forward. Many homeowners in Indiana face roof replacement due to harsh weather and aging roofs. A new roof can also boost your home’s curb appeal and increase its property value.

Key Takeaways

  • Schedule a free inspection to assess your roof’s current condition.

  • Choose materials rated for Indiana’s storm and winter climate.

  • Prioritize contractors who offer warranty-backed installations.

  • Understand how ventilation and insulation affect roof lifespan.

  • Explore financing options for manageable budgeting.


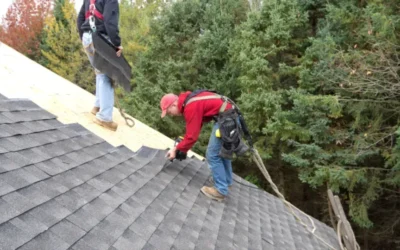
1. Know When It’s Time for Replacement

Most asphalt roofs last between 15 to 30 years. But in Indiana, hailstorms, ice dams, and high winds often shorten that timeline. Warning signs like curled shingles, chronic leaks, or daylight in the attic are clear signals—but professional inspections can reveal hidden damage, especially after severe weather. Additional signs you may need a new roof include damaged shingles, such as cracked or missing shingles, and water stains in the attic, which can indicate leaks or water intrusion. If these issues are widespread, your roof may need to be replaced rather than repaired.

Free inspections from Kingdom Roofing Systems help homeowners make informed, pressure-free decisions about roof health and replacement timing.

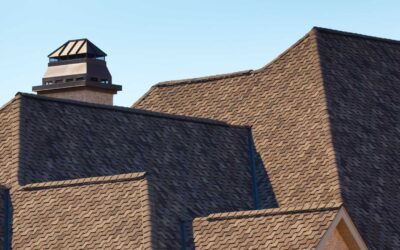
2. Choose Weather-Resilient Materials

Indiana’s mix of heavy snow, intense sun, and high wind calls for materials that can withstand extreme shifts. Common roofing materials like asphalt, metal, and wood each offer unique benefits, and choosing the right roof shingles can significantly impact both the durability and appearance of your home. At Kingdom Roofing Systems, we recommend:

  • Owens Corning Duration® Shingles – known for impact resistance and SureNail® technology

  • Synthetic underlayment – for moisture protection beneath shingles

  • Ice and water shields – especially vital in valleys and near gutters

There is a wide variety of roofing products available, including energy-efficient and impact-resistant options to suit different needs and styles.

Using all new materials for your roof replacement ensures a complete system that maximizes longevity and warranty coverage.

Explore Owens Corning Roofing Options

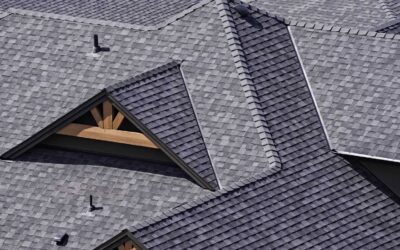
3. Understand Your Ventilation & Insulation Needs

A successful roof replacement goes beyond shingles. Proper attic ventilation and insulation are essential for regulating moisture and temperature, especially during Indiana winters. Without them, you risk mold growth, ice dams, and energy loss.

Our team evaluates these components during every inspection, recommending upgrades only when they’ll enhance long-term performance and efficiency. We often suggest solutions like ridge vents and attic fans to improve attic ventilation and help draw in cool air, which regulates temperature and boosts overall energy efficiency.

4. Verify Licensing, Insurance & Certifications

Roof replacement is a major investment—your contractor should be up to the task. It’s essential to hire experienced roofing contractors and a reputable roofing company with a strong local presence. In Indiana, that means choosing a company that is:

  • Fully licensed and insured

  • Backed by manufacturer certifications, like our Owens Corning Platinum status

  • Locally experienced, with a record of integrity and satisfied homeowners

To ensure you receive the best value and workmanship, get quotes from multiple roofing companies and check the qualifications of their roofers.

With Kingdom Roofing Systems, you’ll also benefit from 14+ years of proven service and faith-based values that prioritize transparency and care.

5. Factor in Permits and Local Codes

Every Indiana municipality—from Marion to Bloomington—has unique building codes and inspection requirements. Our team manages all permits and ensures full compliance, including:

  • Ice barrier installation where required

  • Proper nailing and underlayment techniques

  • Drip edge and flashing specs

Providing specific details about your roof is essential to ensure permits are accurate and comprehensive.

Code inspections may also reveal necessary repairs that must be addressed before the project can proceed. Skipping these steps can void warranties and compromise safety, so it’s best left to experts who know Indiana’s codes inside and out.

6. Plan for Financing and Warranty Protection

A new roof is a serious investment, but it shouldn’t be a financial burden. 

But our replacements come with lifetime manufacturer warranties and optional workmanship guarantees, giving you lasting peace of mind.

7. Schedule Your Project for the Right Season

Indiana’s spring through early fall provides the ideal weather window for roof work. While emergency repairs can be handled year-round, full replacements are best done when temperatures and humidity allow for proper sealing and curing.

Booking early in the season also helps avoid delays from weather or scheduling backlogs.

8. Understanding the Roof Replacement Process

The roof replacement process is more than just swapping out old shingles for new ones—it’s a carefully coordinated project that ensures your home stays protected for years to come. It all starts with a comprehensive roof inspection, where a qualified roofing contractor assesses the current roof for damage, wear, and any trouble spots that might require attention. This inspection helps determine whether a full replacement is necessary or if repairs to the existing shingles will suffice.

Once the need for a new roof is confirmed, your contractor will walk you through the available roofing material options, taking into account your home’s roof pitch, energy efficiency goals, and budget. The right roofing material can make a significant difference in both the performance and the overall cost of your roof replacement. After selecting materials, the replacement process moves forward with the removal of the old roofing, installation of new underlayment, and careful placement of new shingles or other materials. Throughout the project, a reputable contractor will keep you informed, address any concerns, and ensure the work meets both manufacturer standards and local building codes. By understanding each step of the roof replacement process, you can feel confident and prepared as your new roof takes shape.

9. Preparing for Your Roof Replacement

Getting ready for a roof replacement involves more than just scheduling the work—it’s about making informed choices and setting your home up for a smooth project. Start by researching different roofing materials, such as asphalt shingles, metal roofs, and wood shakes, to find the best fit for your needs and budget. Each material has its own benefits, from the classic look of shingles to the durability of metal roofs, so consider what matters most for your home.

Next, it’s essential to choose a reputable roofing contractor who can provide a clear, detailed estimate that outlines the total project cost, including materials and labor costs. Don’t hesitate to ask questions about the replacement process, timelines, and what to expect on installation day. Before work begins, prepare your property by clearing the area around your house, moving vehicles, and protecting landscaping or outdoor furniture. Taking these steps helps the roofing crew work efficiently and keeps your belongings safe. With careful planning and the right team, your roof replacement can be a stress-free experience that adds value and protection to your home.

10. Energy Efficiency Considerations

When replacing your roof, energy efficiency should be a top priority. The roofing material you choose can have a big impact on your home’s comfort and utility bills. Metal roofing, for example, is highly energy efficient because it reflects sunlight and helps keep your home cooler in the summer. In contrast, asphalt shingles tend to absorb more heat, which can increase cooling costs during hot Indiana summers.

Beyond the roofing material itself, factors like roof pitch, insulation, and ventilation play a crucial role in your home’s overall energy efficiency. A properly insulated and ventilated roof helps maintain a consistent indoor temperature, reducing the strain on your heating and cooling systems. This means lower energy costs and a more comfortable living environment year-round. When planning your new roof, talk to your contractor about the best ways to maximize energy efficiency, from selecting the right roofing material to ensuring your attic is well insulated and ventilated.

11. Roof Durability and Maintenance

Investing in a new roof is just the beginning—ongoing maintenance is key to ensuring your roof stands the test of time. Regular roof inspections are essential for catching small issues before they turn into costly repairs. Homeowners should also keep gutters and downspouts clear to prevent water damage and maintain proper drainage around the roof.

Choosing a durable roofing material, such as architectural shingles or metal roofing, can significantly extend the lifespan of your roof and reduce the need for frequent repairs. These materials are designed to withstand harsh weather and resist common problems like water damage and wind uplift. By staying proactive with maintenance and selecting high-quality materials, you can protect your investment and enjoy the peace of mind that comes with a strong, long-lasting roof over your head.

FAQ: Roof Replacement in Indiana

Q: How long does a roof replacement take in Indiana?
Most residential roofs take 1–3 days, depending on size, materials, and weather.

Q: Is a permit required for roof replacement?
Yes. Our team handles all local permit requirements for you.

Q: What’s the best shingle type for Indiana weather?
Owens Corning Duration® shingles offer proven storm resistance and strong wind warranties.

Q: Do you offer financing options?
Yes, including 5-year no-interest financing (with approval).

Q: What areas do you serve?
We serve Marion, Indianapolis, Bloomington, and surrounding Indiana counties.


Ready to Protect Your Home?

Don’t leave your roof to chance. Whether you need a second opinion or you’re ready to move forward, Kingdom Roofing Systems offers free inspections and expert recommendations rooted in faith, care, and Indiana expertise.

Schedule Your Free Roof Inspection!


Are you thinking about getting your roof replaced?

8 Things to Consider When Replacing Your Roof: A Guide for Indiana Homeowners

Jun 1, 2025 | Roofing

Dealing with moss on your roof in Indiana? Removing it promptly is essential to prevent damage. Hiring a professional roof inspector for thorough evaluations is crucial to ensure your roof’s condition is properly assessed. If left unattended, moss can trap moisture, leading to structural issues such as loosened shingles, roof leaks, and the growth of damaging organisms like mold and algae. This guide shows you how to get moss off your roof in Indiana effectively and keep it off for good.

Key Takeaways

  • Moss retention on roofs can lead to moisture issues, damaging shingles and compromising the roof’s structural integrity, making early identification and removal essential.
  • The best time to remove moss in Indiana is during spring and summer when growth is easier to manage due to warmer and dryer conditions.
  • Regular maintenance by a roofing contractor, including debris clearance and the installation of prevention measures like zinc strips, is key to preventing future moss growth and ensuring roof longevity.

Why Moss is a Problem for Your Roof

Neglecting the presence of moss might seem inconsequential, yet if not managed, it can inflict considerable harm on your roof. Moss’s propensity to hold onto moisture when in contact with roofing materials is particularly problematic, as it prompts the deterioration of shingles and fosters wood rot over time. This trapped moisture accelerates the degradation process for roofing materials and can threaten the structural soundness of your roof, leading to expensive repair work. As this cycle progresses, moss proliferates, compounding these issues.

The expansion of moss has another detrimental effect. It can pry apart shingles thereby paving avenues through which water may infiltrate causing leaks and additional damage. Its weight adds undue strain to a roof structure that could yield lasting damage if left unchecked. Early detection and remediation are critical in avoiding grave consequences like extensive damages or costly repairs—particularly pertinent when asphalt shingles come into play. A home inspector can identify moss issues during a general assessment, but a dedicated roofing contractor might be necessary for a specialized focus. Additionally, inspecting attics for signs of moss-related damage, such as water stains and wood rot, is crucial.

To overlook moss accumulation spells potential trouble for any rooftop. Conducting regular inspections focused on detecting early signs of growth plays an essential role in preemptively dealing with these threats before they escalate beyond control—a strategy pivotal for circumventing future proliferation that leads to problems down the line while ensuring one’s roof remains intact thus bypassing comprehensive repairs or total replacement woes. Knowing your roof’s condition through these inspections provides crucial insights for budgeting and planning future repairs.

Identifying Moss on Your Roof

To tackle the issue effectively, it’s essential to spot any moss present on your roofing. Moss commonly forms in lush green clumps and favors the shaded, moist spots atop your roof. In contrast to algae that manifests as slick dark lines, roof moss presents itself as soft, dense vegetation frequently nestled into shingle gaps.

It is imperative to perform a thorough inspection of the roof to detect early signs of moss and stave off additional harm. Regular inspections should specifically search for evidence of this growth so that you can address it swiftly. Early detection allows you to implement measures for eradicating the moss and safeguarding your roof’s structure during a home inspection. This may also entail enlisting expertise from a roofing professional to conduct a thorough roof inspection and provide a detailed assessment.

Best Time to Remove Moss in Indiana

The timing of moss removal is essential for its success. In Indiana, the prime seasons to tackle removing moss are spring and summer, with warm and dry climates being ideal. The summer period offers a particular benefit as during this time, moss often enters a dormant state and adheres less firmly to roof shingles, thus simplifying the scraping process.

It’s preferable to undertake moss removal when the weather forecast predicts clear skies since this assists in thoroughly drying out any clean moss remnants, facilitating their complete eradication. Wet conditions can make moss removal more challenging as moss holds moisture against shingles, promoting the growth of damaging organisms and creating slippery conditions.

Selecting just the right moment for eliminating moss plays an instrumental role in sustaining a tidy appearance for your roof—a key factor that contributes substantially to both its durability and overall condition. Engaging a professional roofing contractor can further enhance the effectiveness of moss removal. These experts conduct thorough assessments and provide critical insights into repairs and specialized services, ensuring that your roof remains in optimal condition.

Step-by-Step Guide to Removing Moss for Professionals

The task of moss removal from your roof should ideally be undertaken by a trusted roofing company, particularly when the extent of moss growth is significant. Initially, it’s crucial to evaluate how severe the moss accumulation is on the roof to decide upon an effective method for its eradication. Techniques such as manual scraping, water washing, and chemical applications are commonly employed pressure washing methods for eliminating moss. If the moss damage is extensive, it may necessitate a roof replacement to ensure long-term durability and property value.

Should you feel uneasy about carrying out this process yourself, it’s wise to engage a professional roof cleaning service to guarantee that the job is conducted safely and with precision. Subsequent sections delve into vital preparatory steps required before initiating moss removal on your roof, various hands-on techniques used in manually removing moss, and instructions for applying chemicals designed specifically as a moss killer solution.

Preparing the Roof for Moss Removal

Before initiating the process of moss removal from your roof, it’s essential to adequately prepare the area. Ensure you prioritize safety precautions by utilizing a sturdy ladder equipped with anti-slip features and wearing footwear that offers good traction to mitigate the risk of falling. It is also advisable to wear protective gloves and eyewear for personal protection while removing the moss.

To safeguard your garden or surrounding plants during cleaning, either shield them using plastic tarps or apply a mixture of watered-down dish soap. This will help prevent any harm that might arise from contact with cleaning agents. When ready to begin spraying your roof, do so starting at its peak and working downward. Using the right tools, such as a high-quality sprayer and appropriate cleaning solutions, helps in preserving the integrity of the moss until you commence manual removal, thereby simplifying this part of the task.

Manual Moss Removal Techniques for Professionals

Using appropriate tools is crucial for the manual removal of moss, which includes using brooms and roof rakes specifically designed for this task. For effectively scrubbing moss from your roof without inflicting damage, a stiff brush proves to be an excellent tool. Employing a long-handled brush can enhance safety and efficiency when clearing moss off elevated roofing areas. Professional roofers are often recommended for this task due to their expertise and adherence to safety procedures.

When attempting to clean the moss from your roof tiles, it’s advisable to start at the top and work your way down in order to prevent water infiltration that could lead to leaks. Before beginning the cleaning process with gentle strokes, moisten the targeted sections with water using a garden hose. This will facilitate easier removal of the moss without having to apply excessive force that might harm the shingles. Using gentle techniques is essential to avoid damaging the roofing materials.

The process of manually removing debris may require considerable effort, but remains effective against small cracks if executed cautiously. This meticulous approach serves as an adequate alternative method where cracked methods fail or are not suitable.

Applying Moss Killer Solutions

Utilizing moss killer formulations guarantees the thorough elimination of moss while also deterring its recurrence. Potent cleaning concoctions, like a diluted mixture of bleach and water, are adept at exterminating present moss and thwarting new growth. For effective moss eradication, it is essential to use a moss remover, as it ensures the proper timing and application needed to maximize results. For optimal efficacy, let these mixtures dwell on the affected areas for no less than 20 minutes before washing it off.

It’s crucial to adopt eco-conscious approaches when combating moss to preserve adjacent ecosystems. Administer the anti-moss solution in a descending manner by employing either a spray bottle or pump sprayer. This ensures uniform application and boosts the efficiency of your efforts as you work towards removing moss from surfaces. After applying the solution, addressing the remaining moss is important. Gently wipe off this residual moss using a soft-bristle brush or cloth as part of the final cleanup to ensure a thorough cleaning.

Post-Removal Cleanup

After eliminating the moss, it is essential to engage in an exhaustive cleaning of the removed area. Employ low-pressure water to cleanse the roof and remove any particles of moss that may still be present, thus securing a spotless surface. It’s also crucial to clear away any leftover residue or debris from gutters and downspouts using pressure washing. This action helps avoid blockages that could lead to water damage. Additionally, ensure that all dead moss is completely removed, as it can still retain moisture and cause potential damage.

Subsequent to rinsing off the roof, conduct a detailed inspection for areas where moss might have been overlooked so as to ensure its complete removal. Implementing these measures safeguards your roof’s integrity and deters growth of moss. Regular roofing inspections are also vital after moss removal to maintain the structural integrity and longevity of your roof.

Preventing Future Moss Growth

Preventing future moss growth requires regular roof maintenance and proactive measures to prevent future growth. Here are some steps to consider.

  1. Clear debris and moss remnants from the roof to prevent clogging of gutters and drainage systems.
  2. Regularly clean gutters to ensure proper water flow.
  3. Trim overhanging trees to reduce moisture buildup on your roof, which in turn limits moss growth.

By following these steps, you can effectively manage and prevent moss growth on your roof to rid it of various elements.

Several preventive measures can inhibit moss and algae growth on your roof. Zinc or copper strips can effectively prevent moss growth by creating a hostile environment for moss and algae. Using algae-resistant roofing shingles can also prevent moss growth in humid and damp areas.

By implementing these preventative measures, you can keep your roofs free from unsightly stains and potential water damage. Regular maintenance and proactive steps will help ensure your new roof remains in top condition for years to come and prevent future growth of moss and algae.

When to Call Professional Roofing Contractors

In cases where homeowners are equipped to tackle moss removal by themselves, it might still be advisable to engage expert roofing professionals for the task. This is particularly true when dealing with widespread moss overgrowth on a roof that can be dangerous due to its slippery nature and steep angles. Trained professionals bring specialized equipment and expertise essential for safely conducting these operations while avoiding any additional harm.

Such specialists deliver comprehensive services beyond just eradicating moss—they also handle gutter cleaning, which is instrumental in deterring new accumulations of moss. They apply methods in their roof cleaning processes that are not only effective but also gentle on the environment, ensuring protection for both your home’s top layer and the natural setting around it. Opting for a professional in roofing guarantees meticulous inspections as well as regular upkeep activities designed to extend your roof’s lifespan. Certified home inspectors contribute crucial assessments regarding your roof’s overall state—including determining if there’s an impending necessity for its replacement. Careful handling during these tasks is crucial to avoid causing damage, especially when removing moss or inspecting shingles.

Cost Implications of Moss Removal

Comprehending the financial aspects of moss removal is crucial for planning your maintenance budget. The cost to clean a roof typically varies from $0.20 to $0.35 per square foot, with factors like the degree of moss growth and chosen cleaning techniques influencing the price. For an average-sized roof encompassing 1,500 square feet, you might expect to spend between $300 and $525 on cleaning services. Meanwhile, for larger roofs around 2,000 square feet in size, the standard cost hovers near $440. Addressing potential problems through moss removal is essential to avoid costly repairs and ensure the longevity of your roofing system.

In terms of prevention strategies such as implementing zinc strips on your roof, you can incur expenses ranging from $25 to $50 per 50-foot roll. While this outlay may appear substantial at first glance, it’s considered a sound investment that serves not only to dodge exorbitant future repair bills, but also extends the overall durability of your roofing system. The timing and quality of these preventative measures can make all the difference in achieving effective long-term results and preventing future issues.

Summary

In conclusion, moss removal is a critical aspect of roof maintenance that should not be overlooked. Moss can cause significant damage to your roof, leading to potential leaks and structural issues if left untreated. Maintaining the roof’s integrity by identifying moss early, removing it effectively, and taking preventive measures can help avoid costly repairs and ensure the overall health of your building.

By understanding the best times for moss removal, the steps involved in the process, and when to call professional roofing contractors, you can ensure your roof remains in top condition. Investing in regular maintenance and proactive measures will pay off in the long run, keeping your roof moss-free, enhancing its curb appeal, and extending its lifespan.

Frequently Asked Questions

What are the signs of moss growth on my roof?

Signs of moss growth on your roof include large clumps of moss and dark stains, which can indicate the presence of algae. These are often found in shaded and damp areas or in the cracks and crevices of shingles.

Addressing these issues promptly can help maintain the integrity of your roof.

When is the best time to remove moss from my roof in Indiana?

The best time to remove moss from your roof in Indiana is during spring or summer, as moss continues to grow and retain moisture, leading to significant problems for roofing materials. The warm and dry weather during these seasons enhances the effectiveness of the removal process.

Can I remove moss from my roof myself?

You can remove moss from your roof yourself, but it’s advisable to conduct a roof inspection before attempting DIY moss removal to ensure the roof’s health and identify any underlying issues.

Additionally, avoid using a pressure washer for moss removal, as it can damage roofing materials and merely dislodge the moss rather than completely eliminate it.

How much does it cost to remove moss from a roof?

Removing moss from a roof generally costs between $0.20 and $0.35 per square foot, amounting to approximately $300 to $525 for an average 1,500 square foot roof. Additionally, incorporating roofing inspections into your maintenance routine can help identify potential issues early, ensuring the structural integrity and longevity of your roof.

What preventive measures can I take to avoid future moss growth?

To effectively prevent future moss growth, seek qualified inspectors through the International Association of Certified Home Inspectors® (NACHI) to ensure your roof is properly maintained. Regularly clean your gutters, trim overhanging trees, install zinc or copper strips, and consider using algae-resistant shingles for the protection and longevity of your house.

These measures will significantly reduce the conditions that foster moss growth.

Related Posts

What to Expect During a Roof Inspection in Indiana

What to Expect During a Roof Inspection in Indiana

What is the best siding for my house? This is a question that can be daunting when you are at the life cycle of your current house or a home you are building. There are a couple of main exterior wall product categories and I will break them down in a way that hopefully simplifies their pros and cons plus their price point.

read more